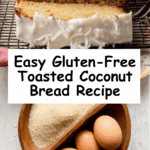
Toasted Coconut Bread [Gluten-Free] Recipe
This Toasted Coconut Bread is a moist and flavorful gluten-free loaf, featuring a rich coconut taste enhanced by toasted shredded coconut and a luscious coconut glaze. Perfect for breakfast, brunch, or a sweet treat, it combines the tropical goodness of coconut with a tender crumb, all made with wholesome gluten-free ingredients.
- Prep Time: 20 minutes
- Cook Time: 60 minutes
- Total Time: 1 hour 20 minutes
- Yield: 1 standard loaf (about 10-12 slices)
- Category: Baking
- Method: Baking
- Cuisine: Gluten-Free American
- Diet: Gluten Free
Ingredients
Bread
- 2 ½ cups gluten-free 1-to-1 baking flour, organic
- ½ cup unsalted butter, softened at room temperature (or use coconut oil or vegetable oil)
- 2 teaspoons baking powder
- 1 teaspoon coconut extract
- ¼ teaspoon sea salt
- Pinch of ground cinnamon
- ¾ cup organic cane sugar
- 3 large eggs, at room temperature
- ½ to ¾ cup full-fat coconut milk or cream
- 1 ½ cups sweetened shredded coconut
Coconut Glaze + Topping
- 1 cup organic powdered sugar, sifted
- 2-3 tablespoons full-fat coconut milk or cream
- 1 tablespoon unsalted butter, melted and cooled
- Toasted shredded coconut, for topping
Instructions
- Toast the Coconut: Heat a medium (10-inch) non-stick skillet over medium-high heat. Add the shredded coconut flakes and stir frequently for about 3-4 minutes until golden and toasted. Remove from heat and let cool completely.
- Prepare the Bread Pan: Preheat the oven to 375°F (190°C). Lightly grease a standard loaf pan with butter or coconut oil, then line it with parchment paper, leaving an overhang on the sides for easy bread removal.
- Mix Dry Ingredients: In a large bowl, whisk together the gluten-free flour, baking powder, ground cinnamon, and sea salt until well combined.
- Cream Butter and Sugar: In another bowl, use a hand mixer on high speed to beat the softened butter and cane sugar together until pale and fluffy, about 2-3 minutes.
- Add Eggs and Liquids: Add the eggs one at a time to the butter-sugar mixture, mixing well after each addition. Then add the coconut extract and coconut milk or cream, mixing until combined.
- Combine Wet and Dry Ingredients: Reduce mixer speed to low and gradually add the dry ingredients to the wet mixture, blending until a smooth, thick batter forms that slowly drips from the whisk or spoon, about 3-4 minutes.
- Fold in Toasted Coconut: Gently fold in 1 cup of the cooled toasted shredded coconut until evenly distributed throughout the batter.
- Fill the Loaf Pan: Pour the batter into the prepared loaf pan and spread it evenly.
- Bake the Bread: Bake for 55-60 minutes, or until a toothpick or knife inserted in the center comes out clean. Halfway through baking, poke very small holes evenly over the surface of the bread to help heat penetrate and ensure even cooking.
- Cool the Bread: Remove from oven and allow the bread to cool in the pan for 25-30 minutes. Then use the parchment paper overhang to gently lift the bread out and transfer it to a wire rack to cool completely.
- Make the Coconut Glaze: In a bowl, whisk together sifted powdered sugar, melted butter, and 2-3 tablespoons of coconut milk or cream until smooth and thick but pourable. Adjust consistency by adding more milk (1 tablespoon at a time) if too thick, or more powdered sugar if too thin.
- Glaze and Top the Bread: Once the bread is completely cooled, spoon the coconut glaze evenly over the top and sprinkle with the remaining ½ cup toasted shredded coconut.
- Serve: Slice and enjoy with tea or coffee for breakfast, brunch, or as a delicious dessert treat.
Notes
- You can substitute the unsalted butter with coconut oil or vegetable oil for a dairy-free option.
- Be sure the eggs and other refrigerated ingredients are at room temperature for best mixing and texture.
- Poking small holes midway through baking helps cooking heat penetrate through the thick loaf to prevent undercooked centers.
- The shredded coconut used for both the bread and topping is sweetened; for a less sweet version, use unsweetened shredded coconut and adjust sugar to taste.
- Cooling the bread before glazing prevents the glaze from melting and sliding off.

